


How to Make A DIY Shower Caddy

"I love how this caddy marries beauty and function, and how it’s going to help me keep my shower clean and organized. I also love the look of cedar in a bathroom."
Materials
During this year’s spring cleaning (which has really been an off-and-on thing since January), I spent about half a day deep cleaning my bathroom. From scrubbing the floors to cleaning the crown moulding along the ceiling, this was probably one of the most serious cleans I’ve ever done.
Have you ever noticed when you clean something really well, it’s impossible to do it without becoming painfully aware of every other thing that isn’t cleaned to that same standard? That was pretty much this whole experience for me. While cleaning the crown moulding that had somehow acquired some discoloration, I realized the tiling in the shower near the ceiling also needed a scrub—so I removed everything from my shower and cleaned it top to bottom.
Now, as much as I would love to be, I’m definitely not a minimalist when it comes to products in my shower. I have a metal basket that hangs from the shower head (rather precariously), but that’s not quite enough storage for me, so there are also some bottles scattered along the windowsill and the ledge of the tub. This not only looks messy, but it’s also a recipe for a dirty, cluttered shower.
I also have lotions and makeup removers that I move in and out, which adds to my dilemma. But then, it hit me! If I had a little homemade shower caddy that was just the right size, I could make it a practice to bring all of my products in and out of the shower with me, and then keeping my shower clean would be that much easier. In the past, a bare shower would have been something I’d have shrugged off, but through this deep cleaning, I realized I love having a perfectly clean shower with nothing in it.
It can be challenging to find a shower caddy that fits your many bottles and fits into the cupboard or onto the shelf where you’re storing it, but when you make things by hand, all of those challenges resolve with just a little math and planning. Let’s get started!
Step 1: Measure Shower Caddy Dimensions
The first step to our DIY shower caddy is to start measuring. Gather all the products you want to store in your shower caddy and arrange them until you have a good fit and a nice shape. I didn’t want a caddy that was almost-but-not-totally square, for instance.
At this point, I decided I wanted to create a holder for my razor to stand up in the corner, and factored in the bulk for this. You should also consider making a tray for a bar of soap, or a platform for unusually small bottles that could be hard to grab.
Write down your inside dimensions of your shower caddy and reference back to them in the next step. For the shower caddy we’re making today, we’re using cedar one-by-twos for the bottom, sides, and handle. This keeps things lightweight, inexpensive, and good for water drainage. A one-by-two is 3/4” thick—factor this into your inside dimensions to put together a cutting list.

Step 2: Cut One-by-Two Lumber
To make the shower caddy, we’ll be cutting one 10’ one-by-two into three bottom pieces, four side pieces, four end pieces, and three handle pieces. We’re also cutting two small pieces for the corner razor holder. You can easily make these cuts with a handsaw and a miter box or with a circular saw. Here are our dimensions, all from one-by-two lumber, if you wish to follow them.
- (3) 9” bottom pieces
- (4) 10 1/2” side pieces
- (4) 6” end pieces
- (2) 10” handle sides
- (1) 7 1/2” handle top
- (1) 1 1/2” razor holder
- (1) 1/8” razor holder

Step 3: Sand One-by-Two Lumber
Sand all your cut pieces with a fine/medium sanding sponge or 150-grit sandpaper, ensuring everything is smooth so you won’t give yourself a sliver when you reach for the conditioner.

Step 4: Assemble Bottom of Shower Caddy
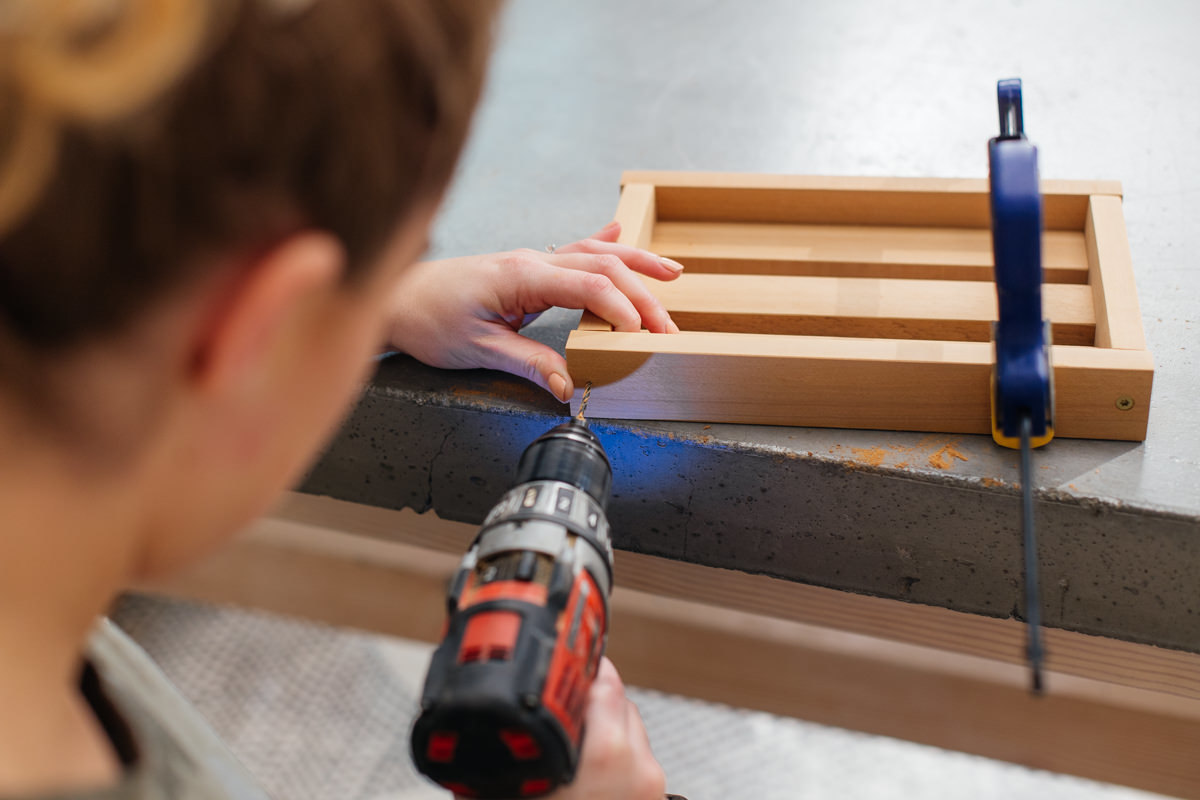
Lay out the three 9” bottom pieces side by side—use some small scrap one-by-two pieces to space them evenly. Position a 6” end piece against the ends of the bottom pieces. Pre-drill and secure with 1 1/4” screws through the end of each bottom piece. Clamp the sides and ends together for added stability while drilling.
Because cedar is such a soft wood, I recommend using a countersink bit for pre-drilling. A countersink bit drills a hole not only for the shaft of the screw, but it also drills an angled hole for the screw head. Using a countersink bit creates a very clean finish for your project.
Repeat this process with the opposite end and another 6” end piece.


Step 5: Assemble Sides of Shower Caddy
Now that you have the bottom of the caddy and the two end pieces attached, position two 10 1/2” side pieces on either side of the end pieces, connecting them and forming a shallow box. Clamp in place for easy drilling.
Pre-drill and secure with 1 1/4” screws at either end.
Step 6: Assemble Upper Wall
Take your remaining side and end pieces and position them in a rectangle like the ones attached around the bottom pieces. Pre-drill and secure with 1 1/4” screws. This box will form the upper wall of the caddy.

Step 7: Attach Handle Sides
Measure along the side of the caddy base. Mark the center and then measure and mark 3/4” away from the center on either side (these will be marks for where the handle will be placed). Repeat this process on the other side of the base and both sides of the upper wall.
Line up the handle sides (10”) with the marks on the base—the bottom of the handle should be flush with the bottom of the base. Pre-drill and secure with glue and 1 1/4” screws. Use a scrap piece of one-by-two on-edge sitting on top of the base as a spacer, then place the upper wall on top. Use a speed square or a piece of wood to line up the ends. Pre-drill and secure the handle sides to the upper wall with glue and 1 1/4” screws.
This step in particular requires gluing because we’re only using one screw to attach at each point of contact. Without glue, these screws will act as pivot points for the wood to turn on.


Step 8: Attach Handle Top
Place the top of the 7 1/2” handle on top of the handle sides, then pre-drill and secure with screws.

Step 9: Add Shower Caddy Razor Holder
At this point, add any details and accessories to your design. We added a razor holder made up of a couple small pieces of one-by-twos.
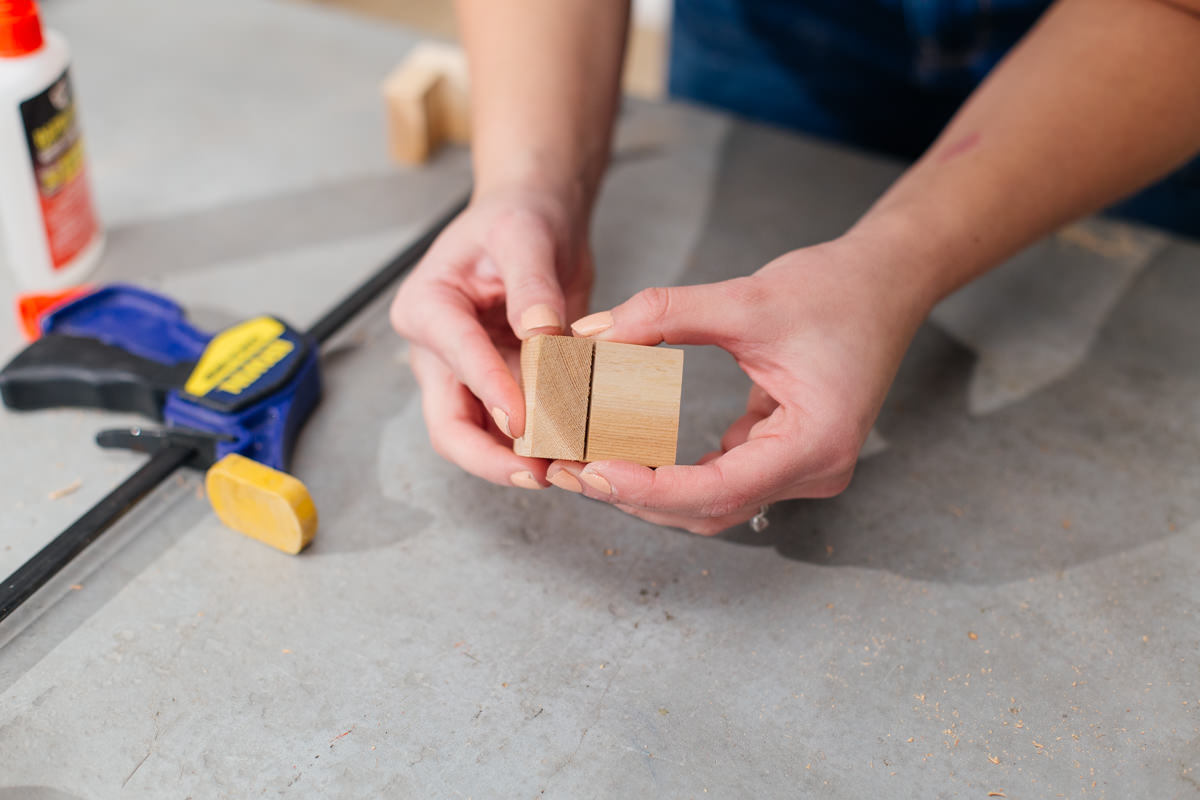
To do this, attach the two razor holder pieces together with glue to form a corner. Butt the end of the small piece up against the side of the longer piece. Clamp and let dry (we used a fast-drying wood glue to speed up this step).
Once dry, fit your razor holder into the corner of the caddy and glue in place. Clamp until dry.


Step 10: Finish DIY Shower Caddy
Lastly, protect your shower caddy with a water-protective stain or finish. You can stain (or leave unstained) and seal the wood with an exterior polyurethane finish, apply an exterior deck stain like Penofin, or follow our direction and opt for teak oil. Because this project is so small and exterior products tend to cost more or just come in large containers, I recommend going with whatever you happen to have on hand.
On that note though, I will give a small plug for teak oil. Teak oil is somewhere in between a stain and a finish, and it was designed for teak decks on ships. That means it’s designed for coming in contact with a lot of water—both rain and ocean spray. Teak oil can be applied over a stain, or it can be applied directly onto the wood (which happens to be my personal preference). Teak oil can even be used as a maintenance and intermittent coat, giving existing varnished surfaces a longer life. So if you don’t already have some, teak oil is definitely a staple to consider having on hand.
Teak oil should be applied with a natural bristle brush, or with a lint-free cloth. Allow to sit 5-15 minutes and then sand with 400 grit wet/dry sandpaper. Finally, wipe off any excess oil and allow to dry.


