


How to Make a Chalkboard Calendar

"To me, the best motivation to organize my time is having something beautiful to write on."
Materials
- One Birch Doorskin (36 1/2" x 84 1/2")
- One 1/2"x 2" x 10' Clear Vertical-Grain Fir
- Rustoleum's Gray Primer (1/2 pint)
- Rustoleum's Chalkboard Paint
- 2" Synthetic Paintbrush
- Painter's Tape
- Wood Glue
- 220-Grit Sandpaper
- Fine/Medium Sanding Sponge
- Drop Cloth
- Wood Stain
- 2" Foam Brush
- Rag
- Tack Cloth
- Permanent Chalkboard Marker
- Chalk
Every New Year it's a goal of mine (and probably yours) to be more organized with my life and my time. To me, the best motivation to do that is having something beautiful to write on. Whenever I buy day planners, they're always really cute. If it's ugly I will never write in it. Having something beautiful on my wall to help me organize my time is really beneficial to me.
I'm a very visual person. In my house we have a big calendar (well, we actually have four, one for each of the next four months) hanging on the wall where our family writes down everything: dinners out with people, events we're going to, people we're having over. Basically, all of the things we would otherwise forget to tell each other. My primary personal calendar is on my phone, but this is the keep-the-family-updated-on-your-life calendar. It's the only way we keep everything straight!
I think the look of a chalkboard is so beautiful. There's something about the color of the stain on the wood and the black and white that has such visual appeal to it on top of being really practical, and this specific project came together so well. It's super lightweight, which I really love, because you can hang it from your wall with Command strips instead of having to go through the whole process of mounting it. It's also fairly inexpensive, which I also love. The backboard is only $17, and because of the size you can get three chalkboards out of it. That means if you make three, the cost of wood for each calendar is only $12. You could team up with two other people to make calendars and each make one from the three pieces.

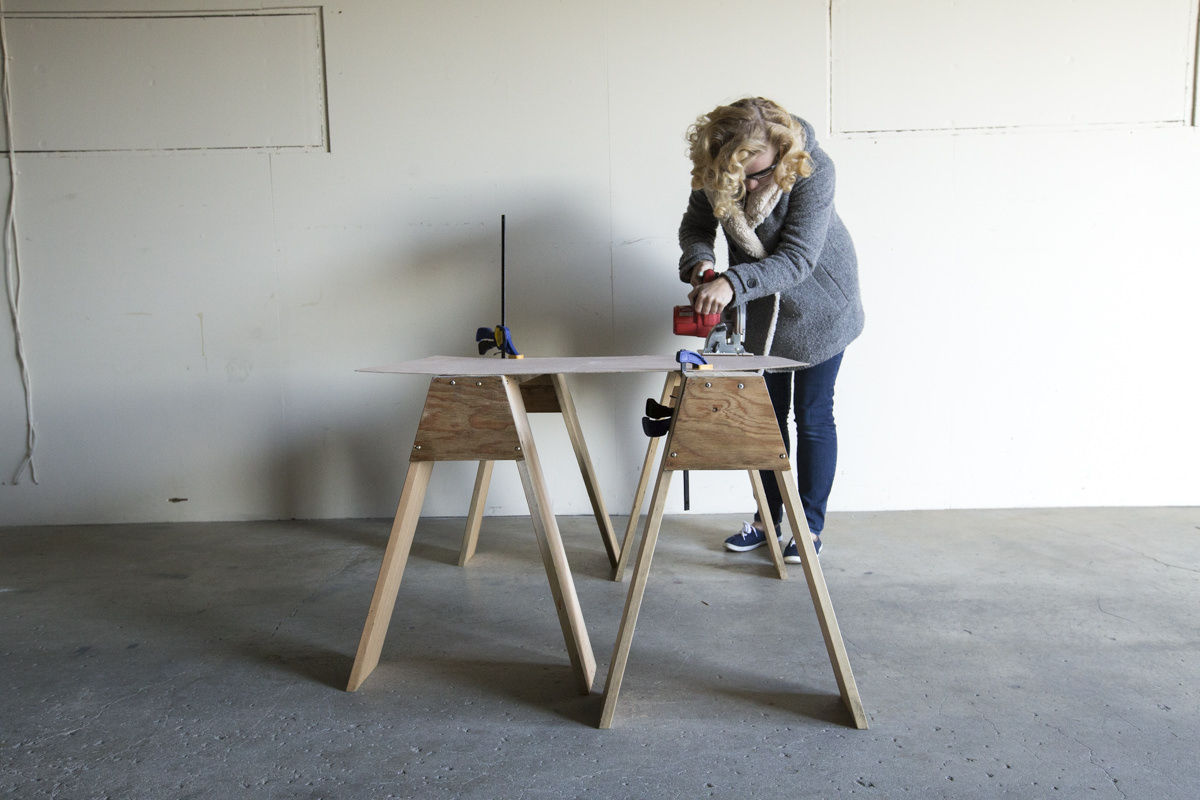
Step 1: Cut Wood
With a circular saw, cut the doorskin to 24” x 33”
"Doorskin" is a weird word, but it actually describes this material pretty well: It's a "skin," or covering, you put on a door. A lot of doors are hollow; rather than buying a 1.5-inch slab of heavy, high-quality wood, you have a structure that you cover with a doorskin, a super-thin sheet of high-quality, really pretty wood. We used a doorskin as the backing of the calendar because it's so thin and lightweight. Dunn Lumber carries two types of doorskins: birch and oak. We're using birch because it's not very porous, so it has a smooth surface to paint over that does really well with the chalk paint. Oak is a hardwood and very porous, so it wouldn't be good for chalkboard paint. When you get it off the shelf, the doorskin is about 36 inches wide and 84 inches tall. It's not the size of a normal sheet of plywood, because it's the size of a door! (Duh.) Someone on the team at Dunn Lumber cut it into thirds lengthwise for me so it would fit in my car (I also had them cut the 10' piece of fir in half).
When you're cutting, it's just so important to keep the wood still. We used bar clamps to clamp the wood down to the sawhorse and keep it in place, which makes the cutting a lot safer. Especially when it's such a light material, you can't get away with not clamping it down. You want to keep it as close to the bench or saw horse it's resting on because it tends to bend and wobble a lot if it's far from the edge.
Using a miter saw, cut the 1/2" x 2" fir at 45° angles to create the frame. If you have a chop saw—which is like a miter saw that doesn't cut at angles—you can cut them square. I just like the aesthetic of the angle. If you don't cut the angles, adjust the length that you're cutting them to so the inside dimensions of the frame are still 21½” x 30½”.
If you want to do this project completely without using power tools, the doorskin is thin enough that you could actually cut it with a utility knife! Then you could cut the frame with a hacksaw and miter box, which is a guide that will cut it at an angle.
Step 2: Tape Off Edges
This was one of those projects during which I made the same mistake 12 times in a row while prepping it. It was absurd. I think I painted six different backs for this chalkboard and I messed up every single one of them because I kept getting the dimensions wrong.
The first time around I had the doorskin cut, and I painted the whole piece (24" x 33") because I thought it would be covered by the frame and didn't need a border. Then I realized because the back and frame are so thin, the frame has to be glued to the backing because nails just aren't short enough. Problem: Wood glue doesn't work the same way when it's glued to paint as it does when it's glued to wood. So, I did it again and taped off a border to glue the frame onto, but this time I taped off too much and there was a gap between the paint and frame. So I redid it, but—I don't know what was wrong with me—I redid it to the exact same measurements as the one I messed up the first time!
Learn from my mistakes: You want to measure and tape off a one-inch border around the edge of the backing. That's the actual dimension after all my failed attempts. ONE INCH. That'll leave you enough of a border to glue on the frame after you're done painting.
Ironically, after everything was done I was at our Bellevue location and discovered that we do, in fact, carry 1/2" nails. So apparently that's an alternative, too.

Step 3: Wipe Clean
Use a tack cloth (or a slightly damp rag) to wipe the backing clean of dust. A tack cloth is a cloth that has a sticky substance on it that removes dust on the wood without getting the wood wet. You can use a dusting rag or a rag that's slightly wet; you just have to let the water dry before you prime the wood. The important thing is for it to be dust-free and dry when you start painting.

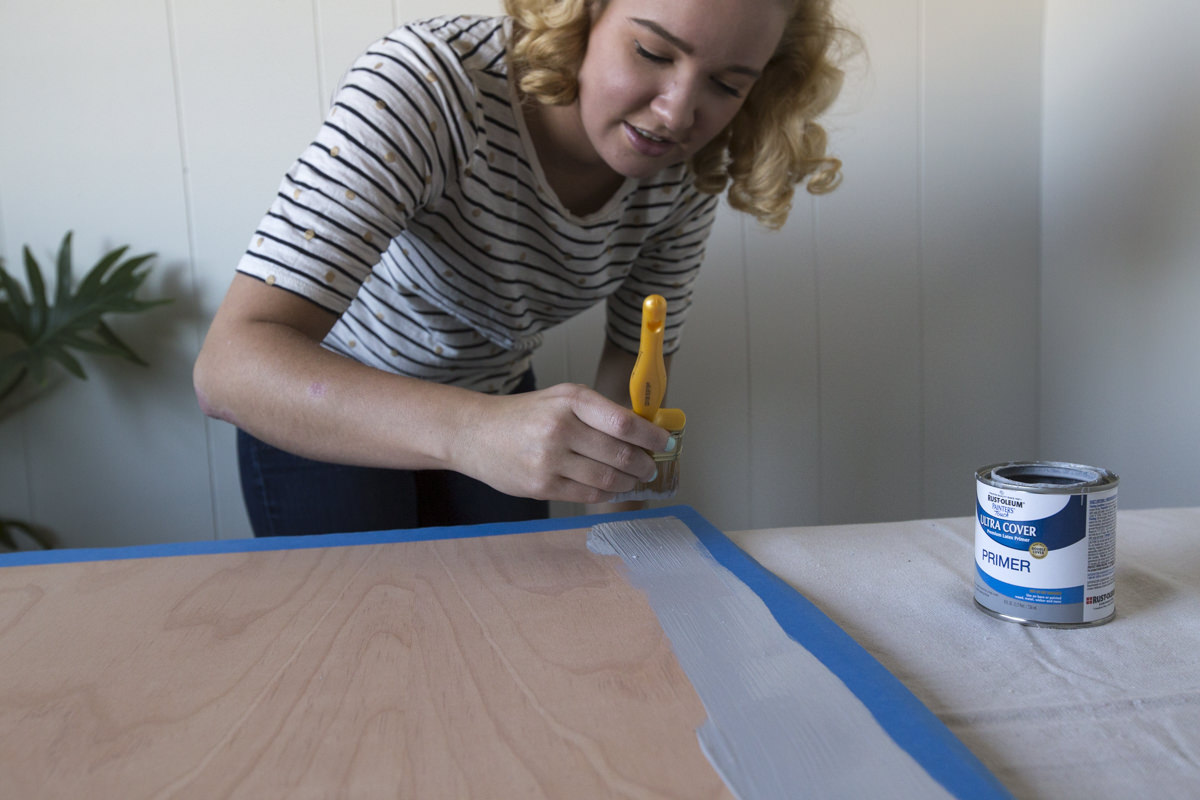
Step 4: Prime
Primer is the only way to ensure that your paint will stay where it's supposed to and won't chip or flake off. If you ask our friend Robin Daly, she will tell you that there's really no way around priming. Yes, it's an extra step, but it's worth it for a flake-free chalkboard.
We used Rust-Oleum primer because it's the same brand as the chalkboard paint. When you're priming and painting something (or staining and finishing) it's smart to stay within a brand because they're designed to work together. That's a real thing. It's not that "X" primer won't work with "Y" paint, but you know that this primer was formulated with the Rust-Oleum paint in mind. It's just kind of a fail proof way to go.
Lay down a drop cloth to prime the front of the doorskin so you don't make a mess. Follow the directions on the side of the can and allow to fully dry before painting. When it's dry, use 220-grit sandpaper to lightly sand the primer so that it’s rough enough for the paint to stick to.

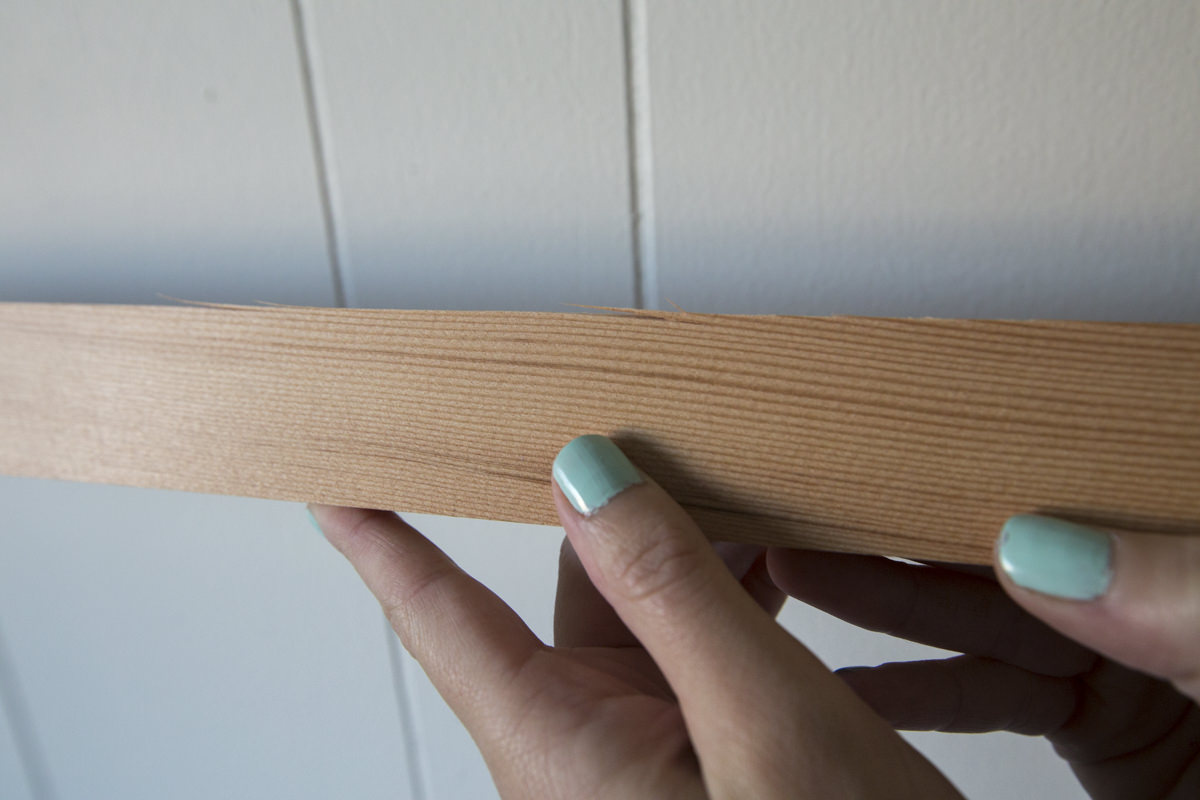
Step 5: Sand the Frame
For our chalkboard frame, we used clear vertical-grain douglas fir, which has a very small grain. The small grain is what makes it look really pretty, but it also makes it splinter really easily. The 1/2" x 2" dimension pieces specifically have very sharp corner edges, unlike all our other lumber that's rounded on the edges. Those sharp edges mean they tend to splinter more. I love the look of the sharp edges—the splinters, not so much.
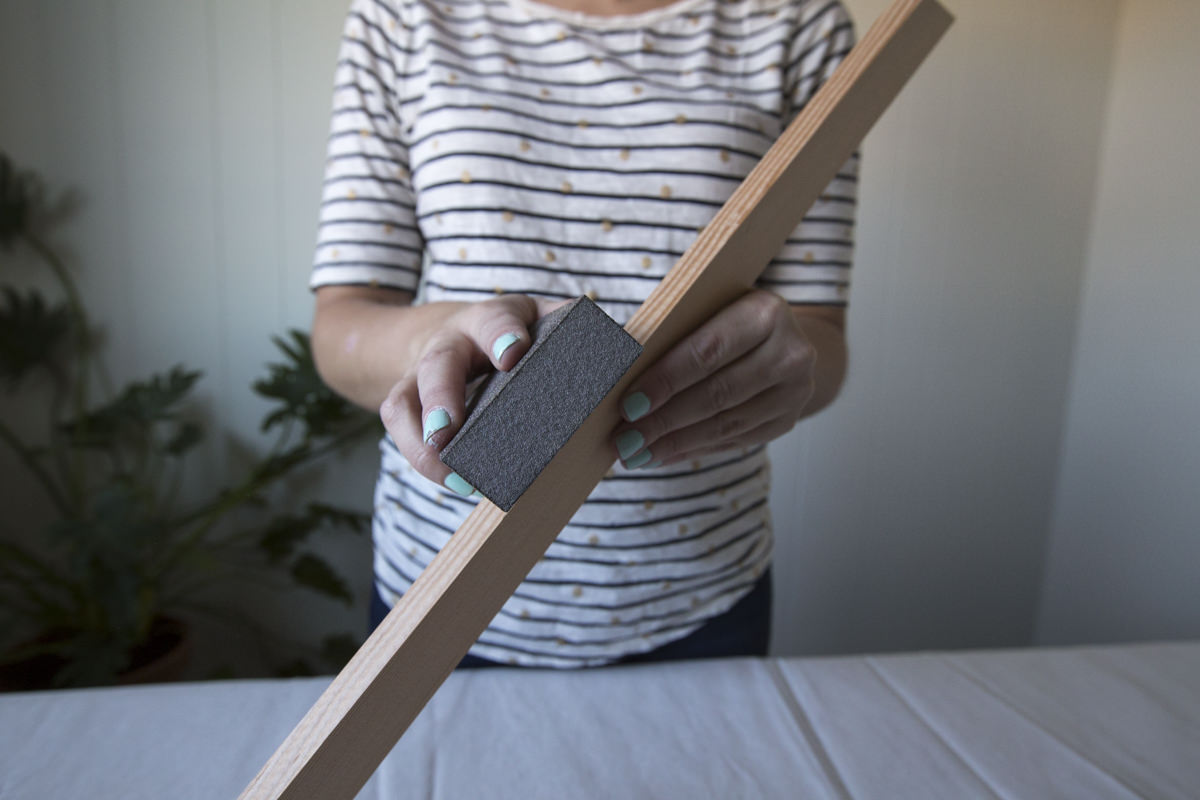
On the edges and the diagonal cuts you've made, use a fine-medium sanding sponge to smooth it out. It's not that much work, but it's worth going over. For some of the bigger splinters, I sometimes use a utility knife to cut them out at their base, because otherwise there are some of them that just won't go away with sanding and will go deeper into the wood if you try to pull them out. Sanding sponges are especially great for this because it keeps your hands away from the splinters, whereas with a piece of sandpaper you can still catch your hand. After I finished sanding and there were splinters sticking out of the sponge, I knew it was a good call!
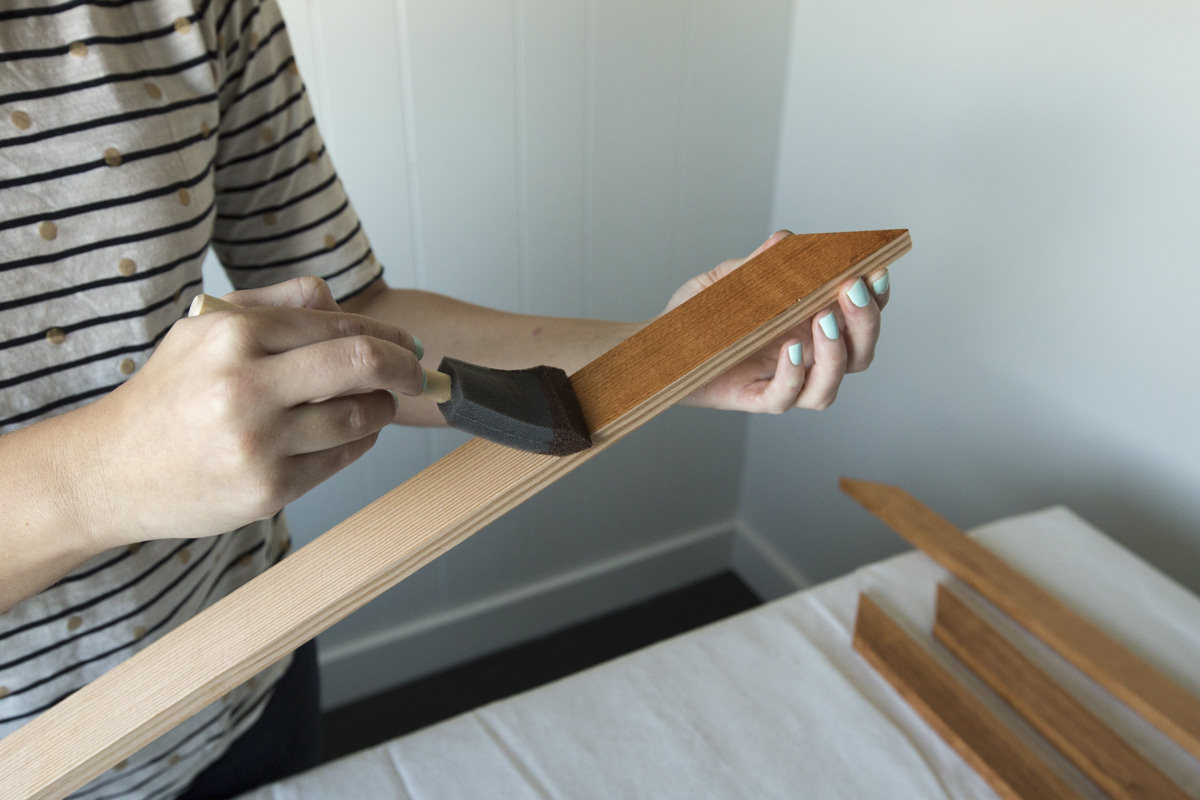
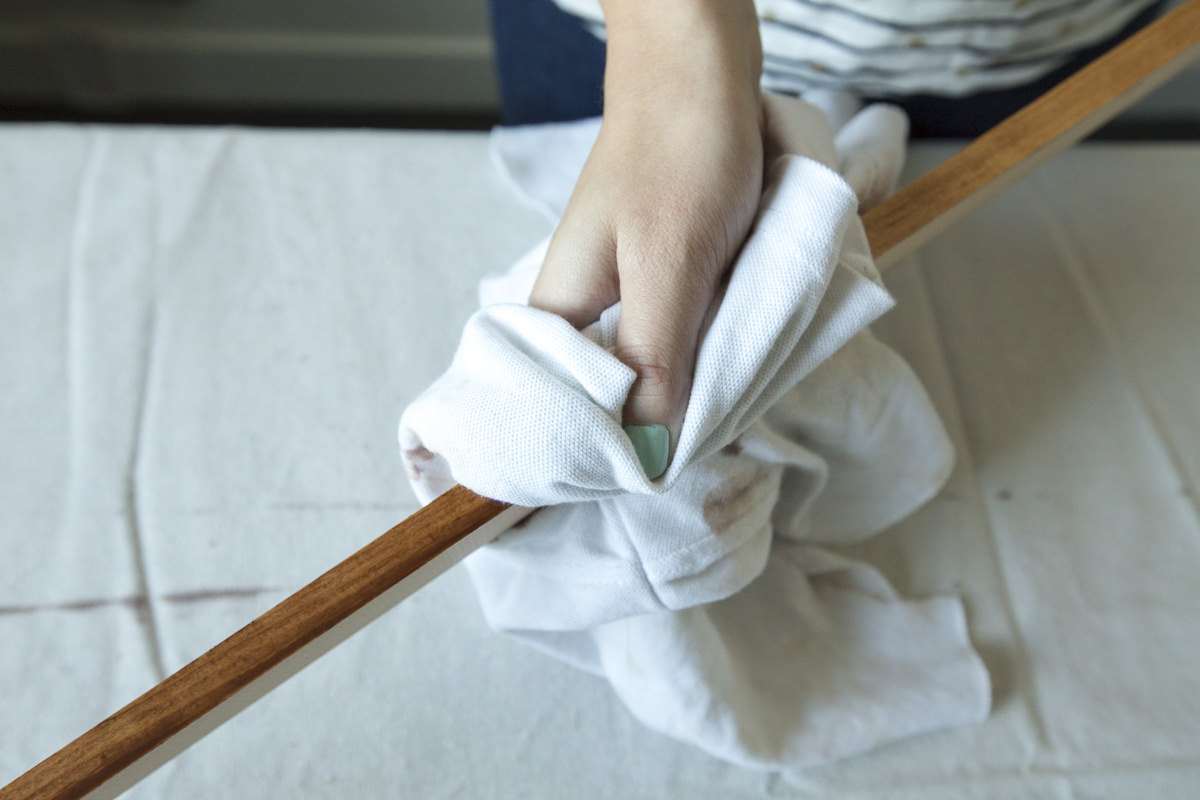
Step 6: Stain
While the primer is drying, stain the frame of the chalkboard. We used Varathane wood stain in the color Light Walnut. I tested out a number of colors on scrap pieces, looking for one that looked really nice against the chalkboard paint, because the fir is a very different color than a white wood. It has a very pink tinge to it, so it affects the color a fair amount when you're staining it.
Follow the directions on the can and don’t forget to wipe off excess if directed. We only stained the top and sides of the frame, because the back is going to be glued onto the other wood and I didn't want the stain to get in the way of the glue.
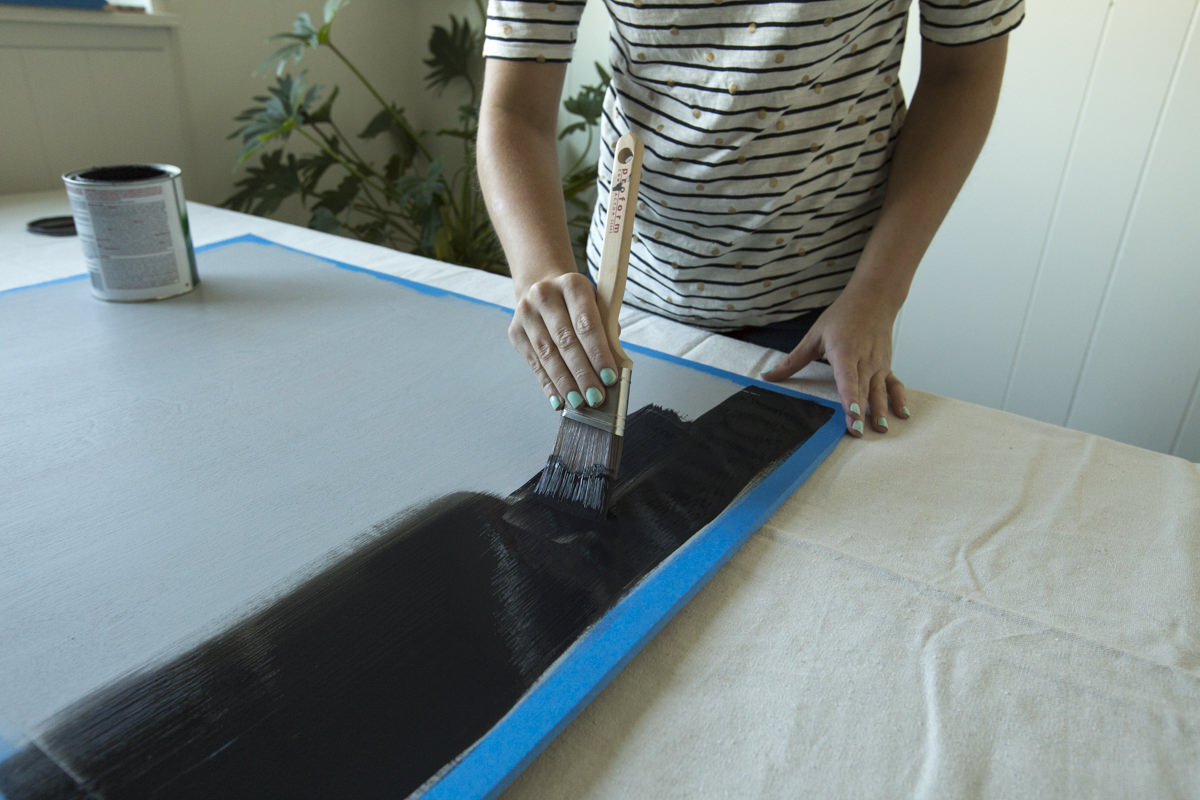
Step 7: Paint
Paint with chalkboard paint. Now we don't stock Rustoleum's chalkboard paint in our stores, but we can order it in for you, or you can find it at Daly's Paint and Decorating.
Something good to know about the chalkboard paint: The first coat goes on very streaky, and had me somewhat concerned at my painting skills, but it's just impossible to get an even coat on the first go. There would be patches where it's totally opaque and patches where you could totally see the primer. It all resolves in the second or third coat.
Follow the directions on the can and add additional coats until the color is solid and no longer streaky (for us this was just two coats).

Step 8: Remove Tape
When the paint is mostly dry, remove the tape.

Step 9: Draw the Grid
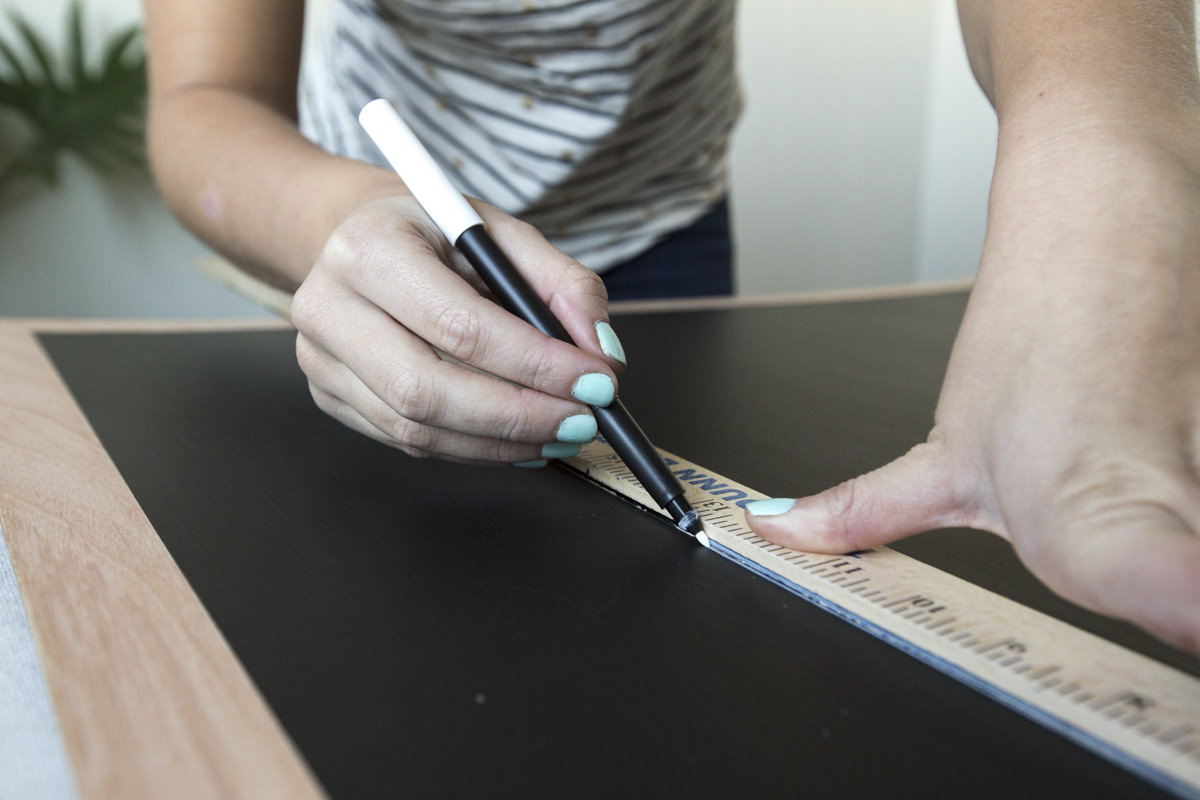
We used a permanent chalkboard marker to draw on the grid and boxes that divide up the calendar. We’ll leave the name of the month and the numbers for regular chalk since those will be changing regularly.
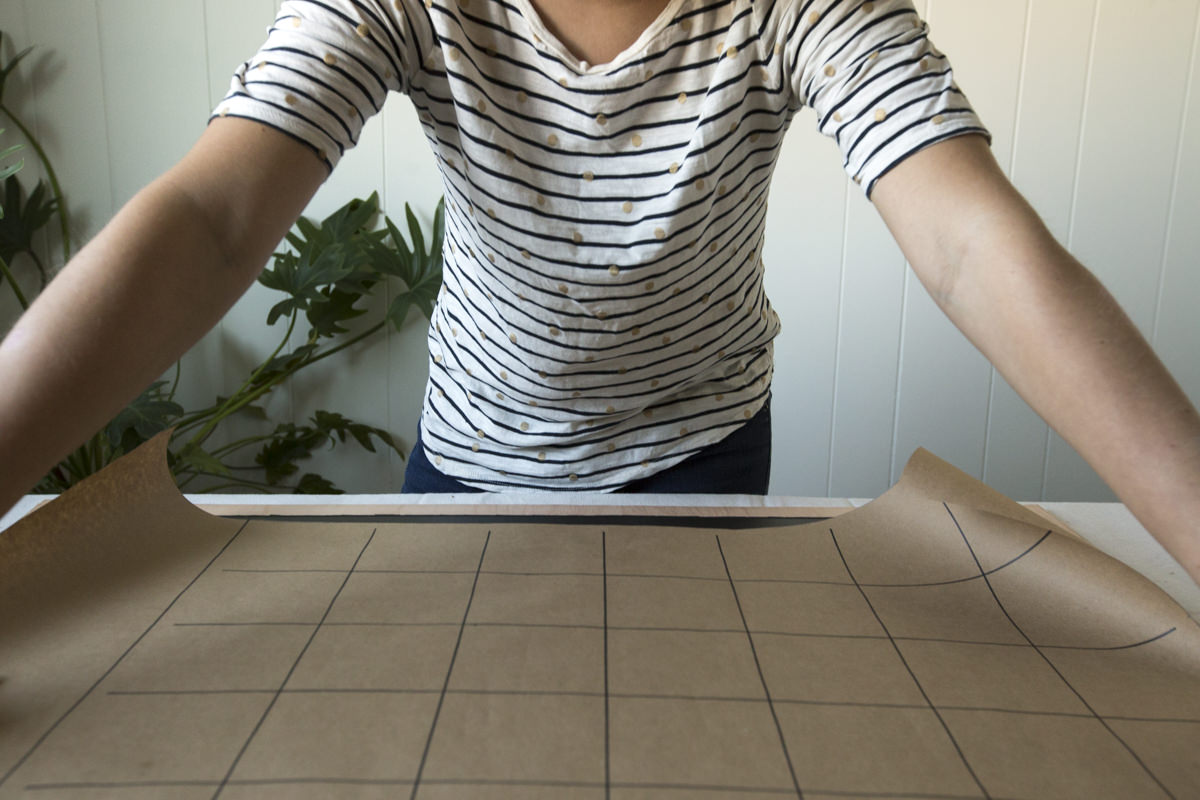
First, measure from the right of the edge of the calendar 5” and draw a vertical line. This will be the section for writing notes; title it at the top. Measure down from the top 3” and draw a horizontal line to the left of the notes box. This will be the header for each month. The calendar grid will be 3 ½” squares. Measure underneath the header box, from left to right and mark at these points: ½”, 4”, 7 ½”, 11”, 14 ½”, 18”, 21 ½”, 25”. Measure from bottom to top, marking at these same intervals up to 18”. Use these marks as a grid. Keep the lines between the ½” marks all around the box. This will create a nice border. Starting with the 4” mark, draw lines across the box, ending 4” from the other side. Repeat with perpendicular lines. Voila!
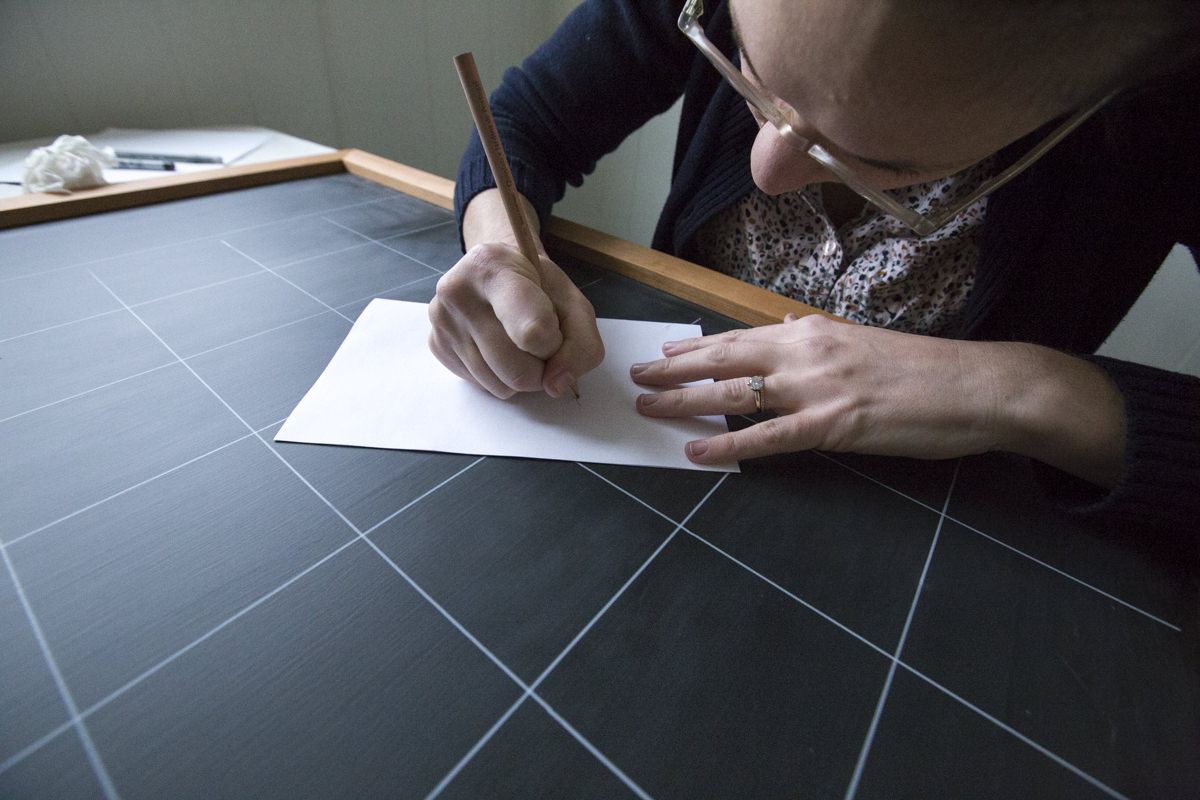
This is just a grid I came up with that seemed like it had boxes big enough to draw in without making the chalkboard huge. There's no rhyme or reason for it other than the fact that I liked it! Which means people can make theirs bigger or smaller if they like it. I used a sheet of butcher paper to work out a design on. If you want to rework a design, that's a great way to try it out without permanently affecting your chalkboard.

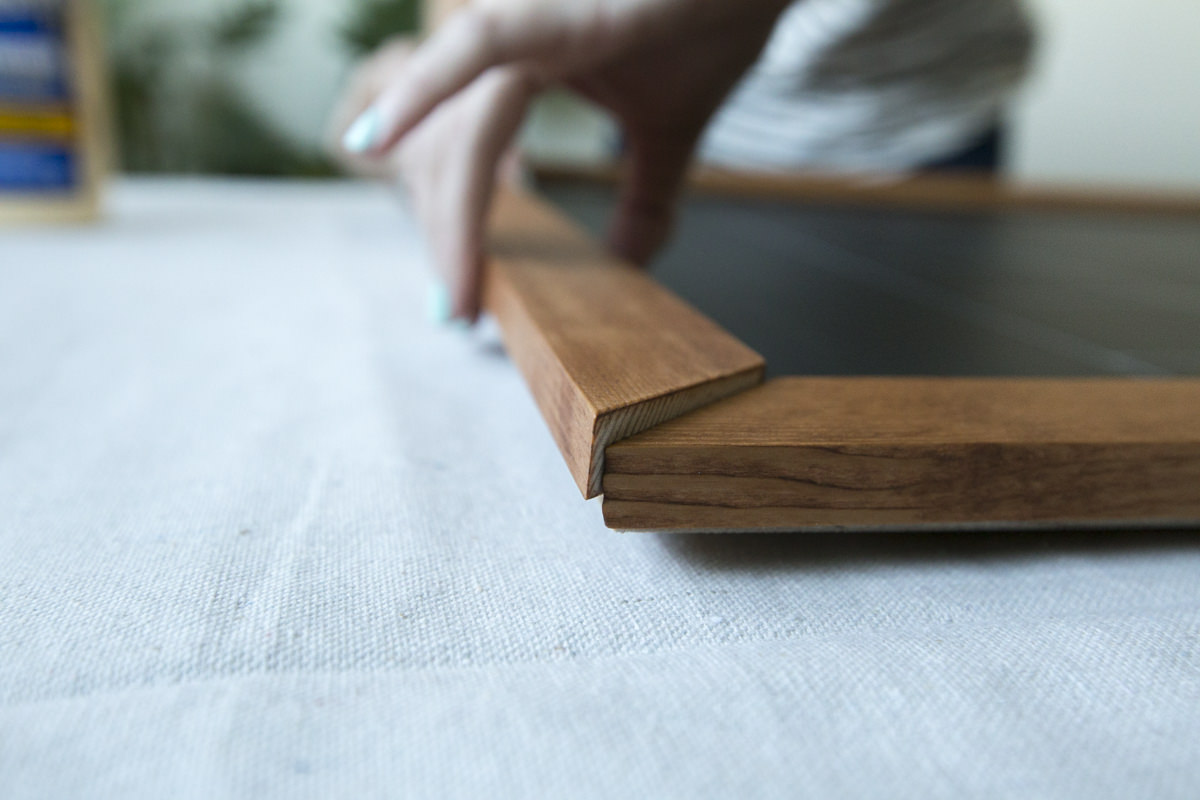
Step 10: Assemble
After all the paint and stain is dry, assemble the board and frame. If any of the frame part has a bend in it it needs a lot of weight to flatten out. Because of the lightness of both the frame and doorskin, we attached the frame to the board just by gluing in place. While it was drying we used books to weigh everything down because the doorskin bends really easily and ours had a bit of a curve to it. We tried clamping it in place, but you need clamps every two inches to keep the doorskin flat because it naturally bends so much. Eventually we gave up on that and used books instead!


Step 11: Conditioning
Take a piece of white chalk and rub it all over the painted surface, then wipe it off. This is an important step if you actually want the first thing you write on the board to erase later on. (Since you'll rewrite the calendar days every month, you definitely want that!) Wipe it off with the same tack cloth you used earlier. You're not supposed to get the paint wet for seven days afterwards, so the tack cloth is a great alternative to a wet rag.
OK, confession time: We've used chalkboard paint multiples times in many different projects over the years, and this is the first time I've followed all the directions and waited a full 24 hours before using chalk on the paint, then primed the paint by rubbing a piece of chalk all over it and wiping it off. I have to say, in all of my other chalkboard paint projects, the first thing I wrote on them never actually erased, and it did on this one. So, it's worth following all the directions!


Step 12: Decorate
The way I write on chalkboards is definitely not blog-worthy, so we asked our friend Ellen from Ink Wellington, a chalkboard artist and calligrapher, to come decorate our finished chalkboard. Ellen also offered some tips on how to use chalk as a writing tool:
- Working with chalk is very forgiving and has such a great finished look.
- I discourage people from using chalk pens as they don't erase well at all. Especially when doing something like a calendar, you want to be able to change it up without leaving stains
- If you want a stronger, brighter line, either dip your chalk in a bit of water, or wet the chalkboard a bit before you start drawing. This will create sort of a paste and will dry nicely.
- Keep a cotton swab and a paper towel close by for smudges and fine-tuning.


Every time I make multiple mistakes I remember I need to go back and check things and not just assume I'm right. Thinking through every step is so important, and is honestly the most time-consuming part of DIY.


