

How To Build a DIY Mini Trebuchet

"The trebuchet we’re building today is a scaled-down version that uses a counterweight to throw a projectile—in our case, a tennis ball. There’s a hazard in throwing anything, and a counterweighted arm can be hazardous if you get in the way. So make sure to stay alert and be safe with this DIY."
Materials
- 2 x 3 - 8' (2)
- 1 x 3 - 8'
- 2 x 2 - 8'
- 1/2" x 2 3/16” - 7' bevel/wedge casing
- 3/8" x 3 1/2” hex bolts (4)
- 3/8” stop nuts (5)
- 5/16” flat washers (12)
- 3/8" x 1 1/4” fender washers (4)
- 3/8" x 4” hex bolt
- 7/8" x 36” birch dowel
- 3/16” birch dowel
- 6” wheels (4)
- #10 x 3” screws (4)
- #8 x 2 1/2” screws (16)
- #6 x 1 1/2” screws (12)
- Hook and Eye
- Screw-eye
- 1/8” cord
- Scrap cloth
- 8-hook
July 14 is Bastille Day, the anniversary of the storming of the Bastille prison in 1789—and a major turning point in the French Revolution. To celebrate, we’re bringing you a tutorial for a trebuchet, a type of catapult that dates back to the middle ages. Trebuchets are not strictly French—but the name is! Vive la France!
The trebuchet we’re building today is a scaled-down version that uses a counterweight to throw a projectile—in our case, a tennis ball. There’s a hazard in throwing anything, and a counterweighted arm can be hazardous if you get in the way. So make sure to stay alert and be safe with this DIY!
Note: A trebuchet utilizes specific measurements to throw a projectile using the power of a falling weight. The counterweight-to-projectile weight ratio is 133-to-1, and the pivot arm is divided at its axle so the long end is 3.75 times the length of the short end. We’ve listed the proper measurements for our trebuchet, but if you make yours bigger or smaller, you’ll need to make sure those ratios remain intact.
Step 1: Cut lumber
Using the cutting guide shown, cut the two-by-threes, two-by-two, and one-by-three to length. We used a hand saw and a miter box, but you can use a power saw if you have one. Note that some of the two-by-twos should be cut at 45 degree angles. You'll also need to cut two 28" pieces of the wedge casing and an 8" length of 7/8" dowel.


Step 2: Mark frame
On two of the 28” two-by-threes, measure 11” from one end, and draw a line across the board. This will provide a reference for mounting other parts of the trebuchet frame.


Step 3: Drill holes for pivot arm
Stack the 15” two-by-threes, and clamp them on top of a scrap piece of wood so you don’t drill through your work surface. Measure 1” in from the end of the top two-by-three, center your mark, and drill a hole through both boards with a 7/8” spade bit. We marked the spot for the hole with an awl, but you can also use a pencil. This will be the pivot point for the trebuchet’s arm.


Step 4: Assemble trebuchet sides
Next, we’ll make the two sides. Just beyond the 11” mark on one of the 28” two-by-threes, take one of the 15” pieces you drilled through in the previous step, and position it at a perpendicular angle.
The pieces should be positioned so that they lay flat, not on edge. Secure by driving a 3 1/2” screw through the 28” piece into the end of the shorter piece. They’ll make a “T” shape. Repeat this process with the other 28” and 15” pieces.
Next, position a 6” piece along the side of the 28” piece so it's at a right angle to the upright 15” piece. Secure by driving a 3 1/2” screw through the 28” piece into the end of the 6” piece, making sure not to drill into the screws previously placed.
Repeat this step to make the other side. The 6” piece will attach to the opposite side of the second 28” piece so that both 6” pieces are facing outward.


Step 5: Drill holes for axles
Measure 2 1/4” in from each end of the 28” two-by-threes and mark on the same side as the 6” pieces. Clamp the two-by-threes to a scrap piece of wood, and drill four 3/8” diameter holes—one on each end. These will be the axle holes for the wheels.


Step 6: Join trebuchet sides
Now, we’ll use two 5” two-by-threes to join the sides of the trebuchet together. With the 6” pieces facing outward and the 15” pieces upright, place one 5” two-by-three at each end of the 28” pieces so they’re standing on their sides and fit neatly between the 28” pieces. Drive one 2 1/2” screw through each end to secure.


Step 7: Attach braces
Because trebuchets use motion and counterweights, they need to be built to withstand the physics involved. This is where braces come in.
On the long side of the frame, position the two 18” two-by-twos with angle cuts so the ends attach to the base of the trebuchet and the 15” upright beam. Secure with 2 1/2” screws.
Mount the 14” two-by-twos in the same fashion on the other end of the frame.
To make braces for the sides of the trebuchet, first determine the proper angle. Hold a two-by-two that’s about 12” long against the frame. Tuck one end under the top of the 18” brace against the side of the upright. The other end will rest alongside the 6” two-by-three. Mark each angle with a pencil, then cut with a hand saw. To make a straight cut without a miter box, you can clamp a speed square to the board to serve as an easy guide for the saw.
Screw the side brace into place using 2 1/2” screws. Repeat for the other side.


Step 8: Mount wheels
Trebuchets have wheels both for transport and to help with the physics of launching a projectile—so our scaled-down version wouldn't be complete without a set! Mount the wheels through the holes you drilled in Step 5 using 3/8” x 3 1/2” hex bolts. Place a washer on the inside and outside of each wheel and next to each nut, which you’ll screw onto the end of the bolts. We used stop nuts, which hold snug even when not fully tightened. This allows the wheels to spin.


Step 9: Attach frame support
Fasten the 20” one-by-three to the bottom of the frame under the uprights with 1 1/4” screws. Add the last 5" two-by-three above this one-by-three and screw into place from below.


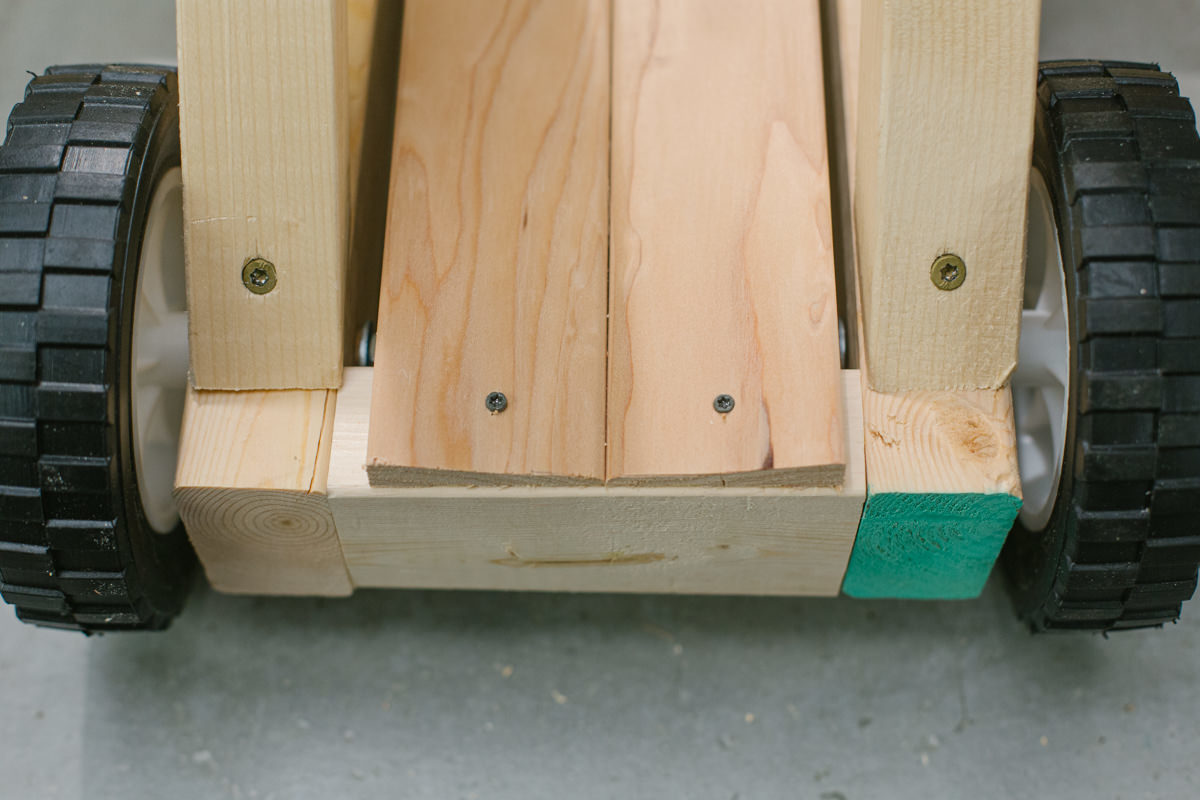
Step 10: Cut and mount trebuchet track
Take two 28” lengths of wedge moulding, and center the pieces on the trebuchet base so they slope together and create a track for the projectile. Pre-drill and secure in place with 1 1/4” screws.


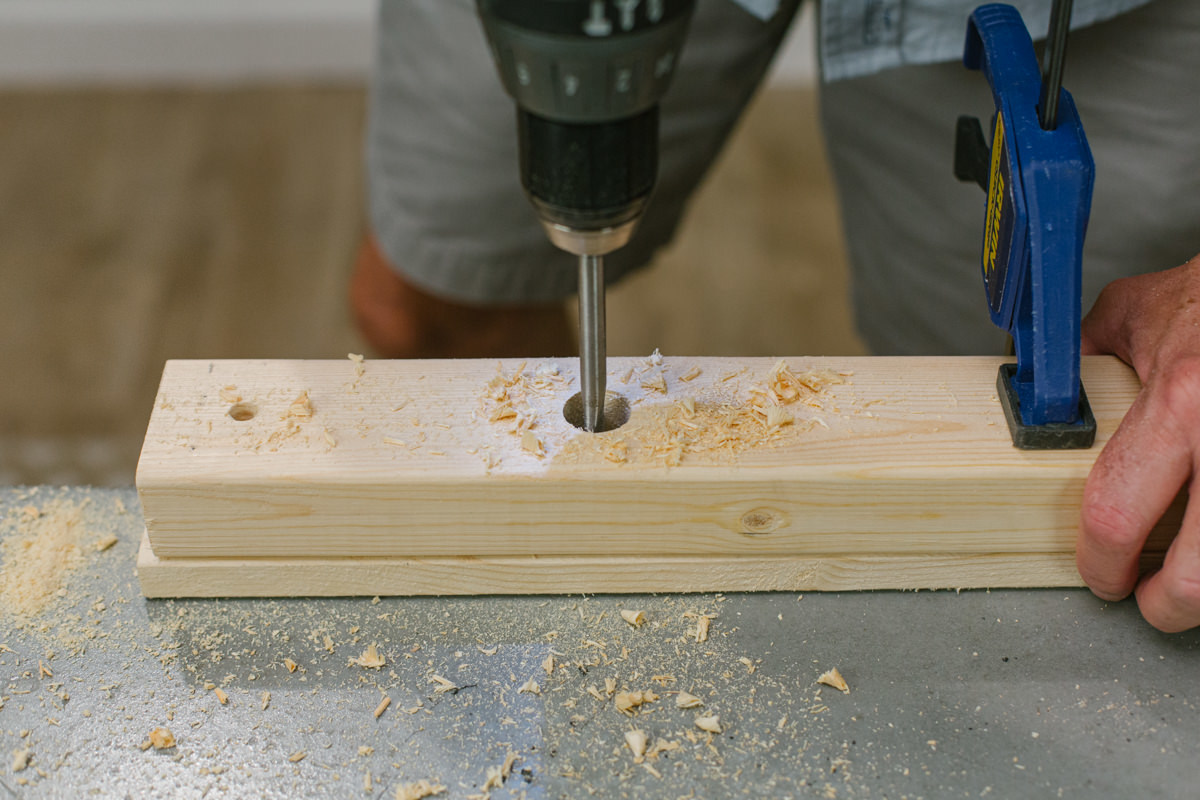
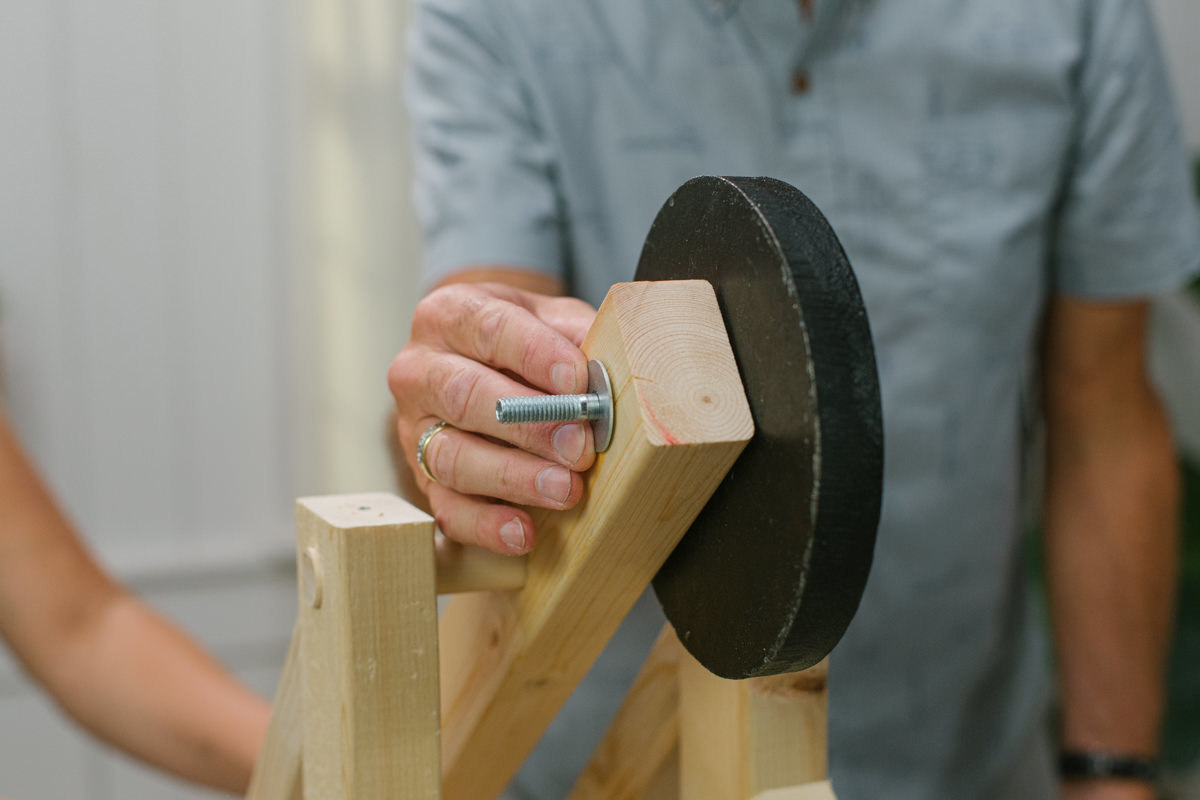
Step 11: Prepare pivot arm
Measure 1 1/4” in from the end of the remaining 28” two-by-three, center your drill bit, and drill a 3/8” hole. The counterweights will mount here later. Next, drill a 7/8" hole 6" in from the same end for the axle of the pivot arm

Step 12: Attach pivot arm
Hold the pivot arm between the two uprights, then slide the 8” length of dowel through one upright, the pivot arm, and then the other upright. To hold the dowel in place, pre-drill holes in the uprights and use small screws to secure.
To hold the pivot arm in place, pre-drill 3/16” holes in the dowel on either side of the arm and slide two 3/16” dowel pieces into place. Small screws would work instead of the dowel.


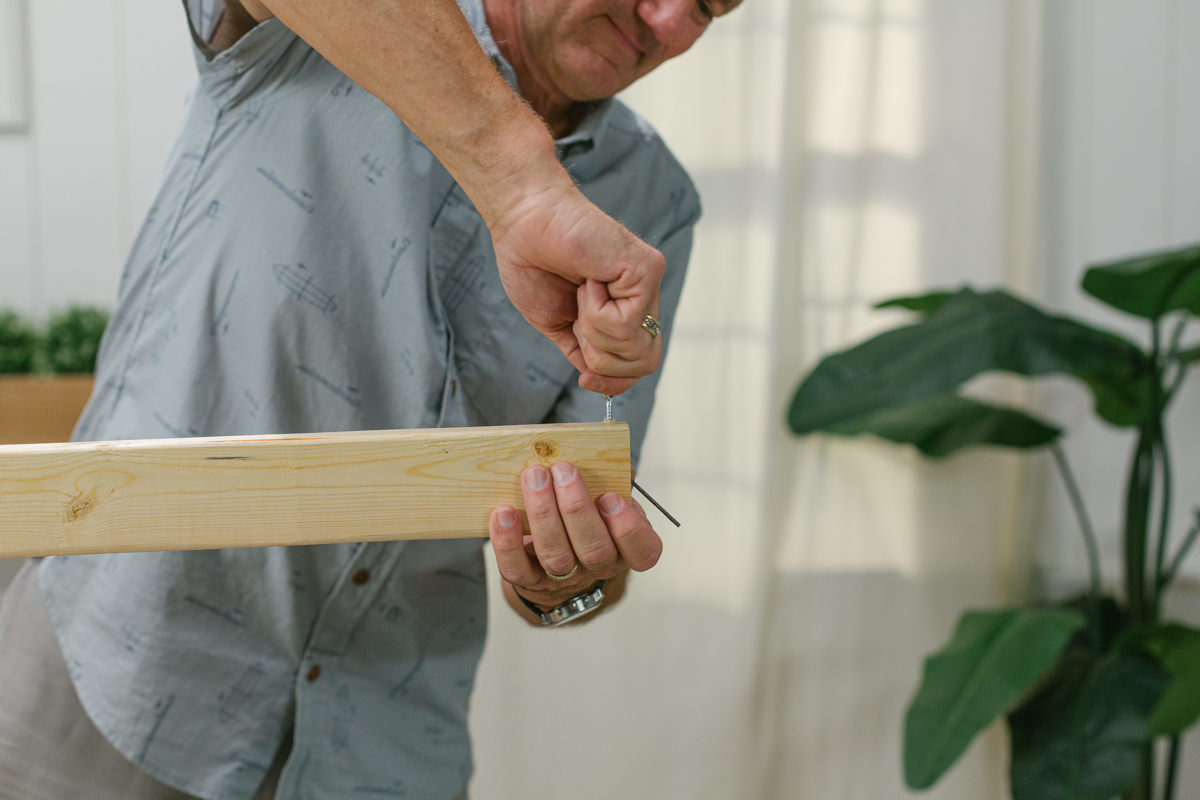
Step 13: Attach hardware and weight
Drive a 2 1/2” finish nail into the tip of the pivot arm at a 45 degree upward angle. Underneath this, on the bottom, long side of the pivot arm, place a screw-eye near that same end of the two-by-three.
With the arm lowered, mount a hook to the base. Place a screw-eye for this hook under the nail on the end of the arm. When the trebuchet is finished, this hook and eye will keep the arm latched in place until you’re ready to release the projectile.
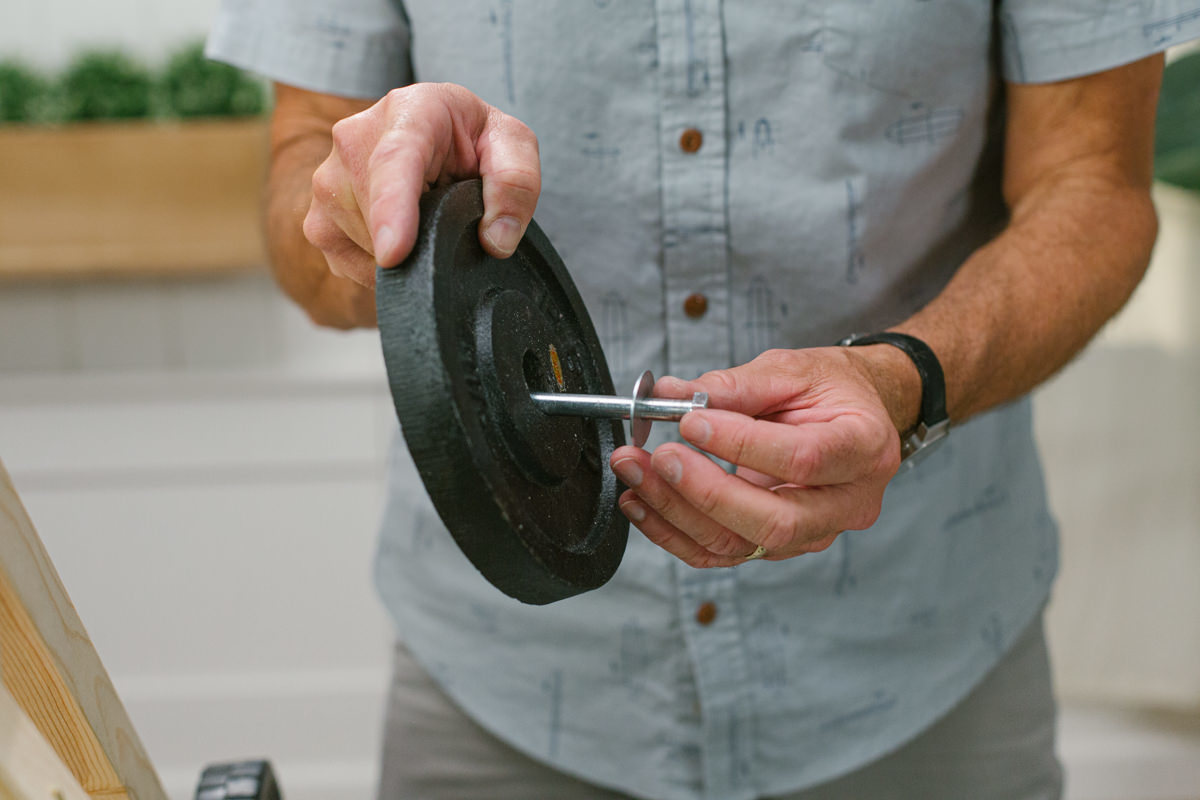
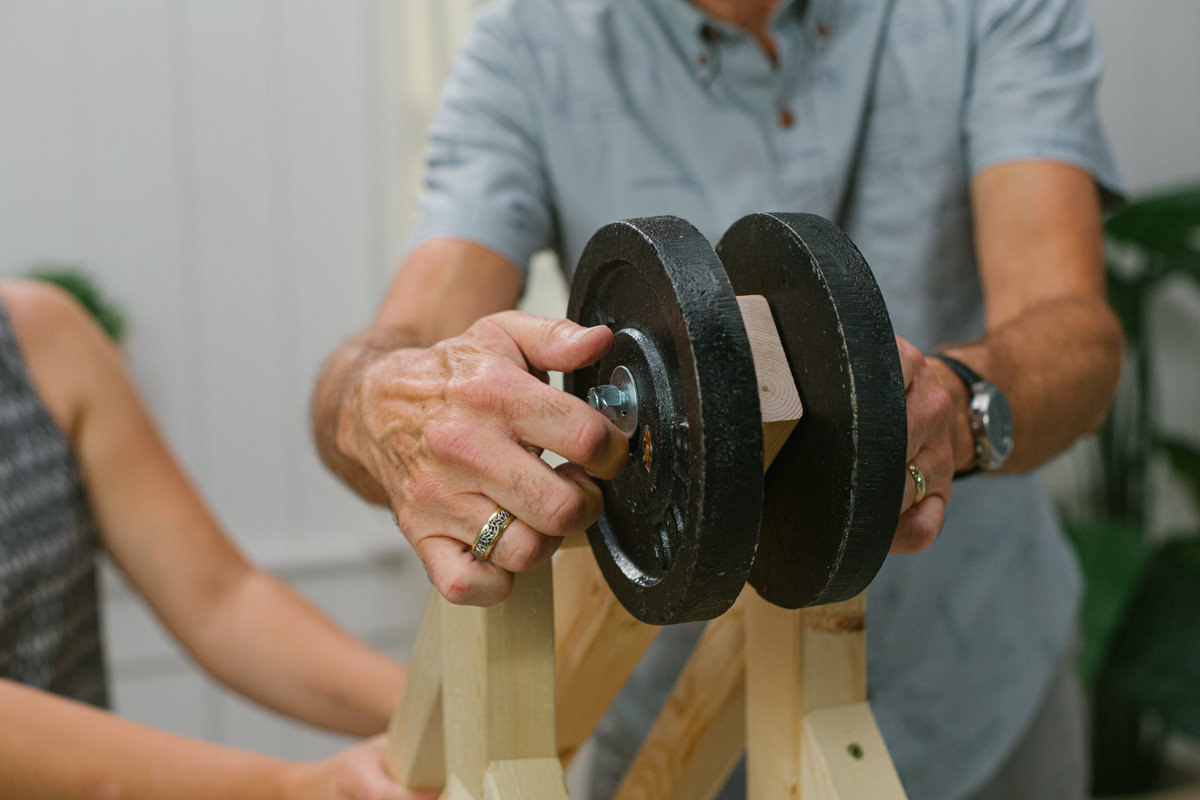
To attach disc weights to each side of the pivot arm, thread a 3/8” x 4” hex bolt through the arm and attach weights using large washers and a nut. If you’re using a dumbbell weight instead of discs, you can attach it with a hose clamp screwed into the end of the arm.


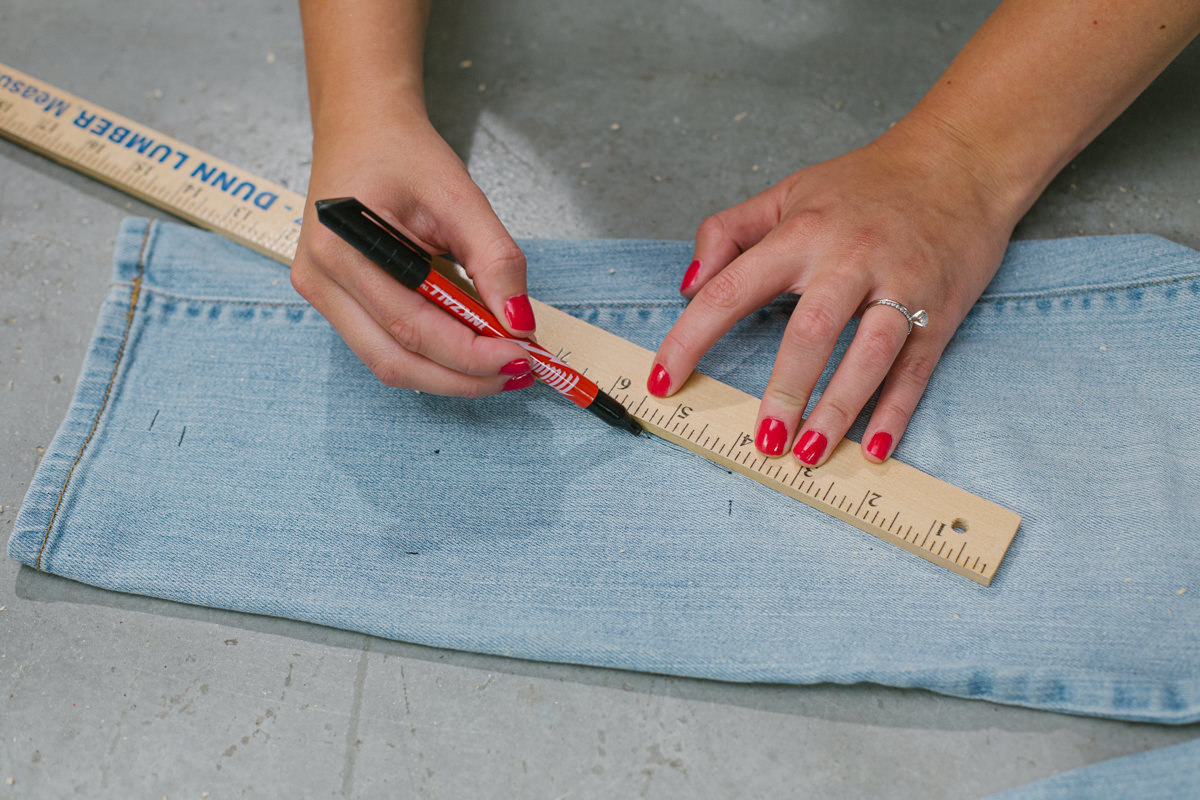
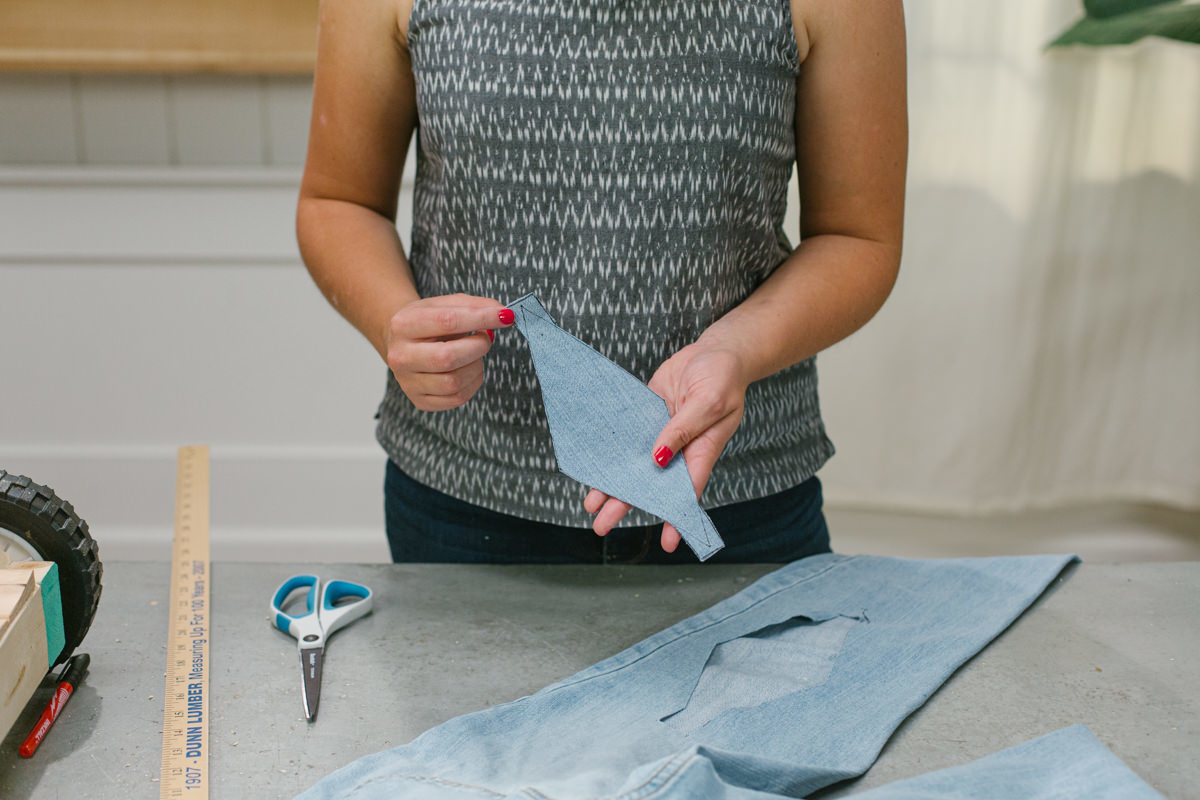
Step 14: Cut sling
On a piece of scrap denim or old clothing, draw a diamond shape. The height of the diamond should be 1.75 times the diameter of your projectile, and the width should be 4.15 times the projectile’s diameter. We used a mini tennis ball with a 2” diameter, so our diamond was 3-1/2” tall and about 8-3/8” wide. To reinforce the endpoints, draw small tabs on the ends of the diamond as shown. Cut along lines.


Step 15: Tie cords
With the tabs folded in for a double thickness, pierce the fabric with an awl about 1" from the ends. Through each end, thread a 24” length of 1/8" cotton cord, and tie securely. Now tie one of the loose ends to the screw-eye on the pivot arm. Tie the other end to an 8-hook, and hang it on the finish nail. The length of the cords should be just about the same length as the long side of the pivot arm—about 22" in our case.


You can adjust the arc of your trebuchet by bending the nail on the end of the pivot arm up or down. This will release the 8-hook earlier or later in the swing of the arm.
That’s it—you’re ready for takeoff! Just place your chosen projectile in the sling, undo the hook, and watch the trebuchet fling your object across the yard.
Looking for other DIY projects? Try your hand at a DIY end table, wine rack trellis, or laundry drying rack.


