


DIY Coffee Table

"While I’m willing to sacrifice precision sometimes, I didn’t want to on this project. The whole process was a great reminder that sometimes a more straightforward design makes for the perfect piece."
Materials
I’ve been playing around with coffee table designs for more than a year. My previous coffee table was a relic from my husband’s college days: One of his best friends handmade a coffee table for him out of a repurposed pallet and gas pipe legs. It lived in my husband’s dorm through college and then came with us to our first and second apartments. It was a great coffee table that served us well—but as we slowly update our apartment and accumulate furniture and decor that we like, the table has started to feel a little bit out of place. A good coffee table is hard to come by, and I’ve spent quite a while looking at table designs, never quite finding one I like or could confidently make.
I had firmly settled on a design when I came to the unfortunate conclusion that I just wouldn’t be able to achieve the precision I wanted. It involved large pieces of plywood with bevel cuts made by a circular saw, and I knew that, despite my best efforts, it likely wouldn’t line up perfectly. While I’m willing to sacrifice precision sometimes, I didn’t want to on this project. The whole process was a great reminder that sometimes a more straightforward design makes for the perfect piece. Because of this realization, I ended up not including any bevel cuts on my final coffee table—and in the end, I was so happy with the level of precision I achieved.
Generally, with my projects (especially furniture), I’m looking for an inexpensive way to do things. But for this particular piece, I decided that I wanted to spend more money and invest in a piece that will last for many years to come. That being said, by swapping out the clear vertical grain Doug fir for something more cost-effective, like spruce, you can build this same table for a fraction of the cost. The legs are also a bit of an investment, but they’re definitely worth it. I purchased these legs from DIY Hairpin Legs, where you can choose from 13 fun color options and order custom lengths (which makes DIYing with them so incredibly easy). I designed the table to be approximately the same height of my couch (which is the recommended height for a coffee table), so make sure you adjust measurements accordingly to fit your living room.
I was so happy with how each element of this coffee table turned out, and I absolutely love how it looks in my living room!
Step 1: Cut wood
The first step is to cut all the wood to length for the coffee table. Cut four one-by-twelve lengths to 46”. Cut your one-by-eight board also to 46”.
To attain the measurements of the last cuts, measure the width of your one-by-eight board (this should be approximately 7 ¼”, but wood is organic, so it’s often slightly different). For the most accurate results, measure the thickness of two lengths of one-by-twelve material stacked on top of each other, and then subtract this number from the width of the one-by-eight. This measurement should be approximately 5 ¾”. Cut four pieces to this length from the one-by-twelve board (for tips on measuring, check out How To Use a Tape Measure).
To make these cuts, you can use a circular saw or a chop saw (make sure it can cut the board's width). The chop saw will give you a more accurate cut. If you’re using a circular saw to make the cuts and want that same accuracy, I recommend measuring the distance from the tool's blade to the edge of the foot and clamping another board as a guide to cut. Otherwise, you can use a speed square as a guide for making the cuts (see How To Use a Speed Square for pointers).


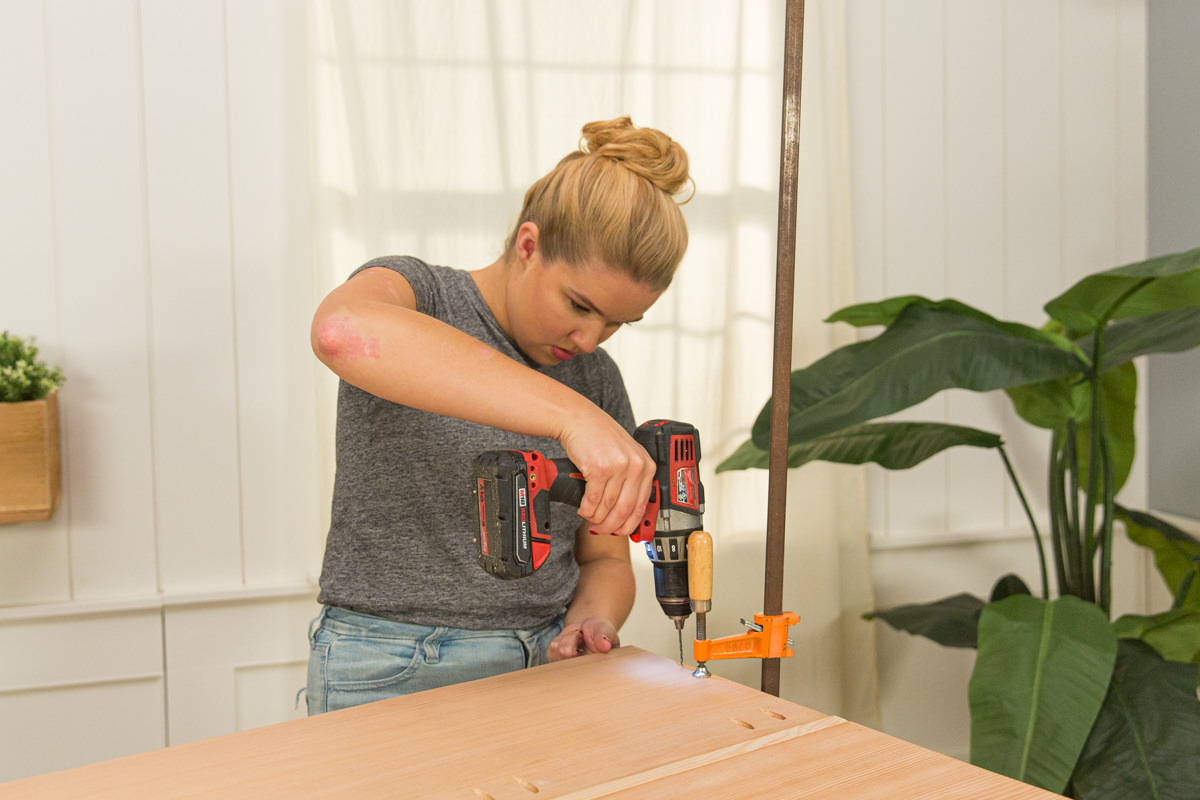
Step 2: Use Kreg Jig to drill pocket holes
This turned out to be an interesting project because the Kreg Jig was a vital component for assembly, but it was only used on one half of the table. I could have used the Kreg Jig on both sides, but to keep things cleaner and reduce the number of pocket holes, I stuck to just one half.
Before this step, I recommend examining your 46” one-by-twelve boards and deciding which two you want to be the tabletop of the coffee table and which two boards you want as the lower shelf.
Set your Kreg Jig to ¾” thick material and clamp in place while drilling. Pre-drill along the bottom of one of the tabletop pieces and along the bottom of one of the lower shelf pieces. I wanted to know exactly where these pocket holes were going so I wouldn’t run into them later, so I used a tape measure to distribute them evenly. Also, use the Kreg Jig to pre-drill two of the short one-by-twelve pieces. If you pay attention, you can pre-drill along what will be the top side of the short pieces, so they’re least noticeable when the table is assembled. I did this with every intention to assemble the table accordingly and then promptly forgot. Luckily, even with the pocket holes near the bottom of the pieces, they’re still not very noticeable.


Step 3: Sand
I like to sand at this point so that I know there won’t be any splinters on the inside that will be hard to sand after assembly. After everything is assembled, I think a final sanding can smooth out any imperfections from the assembly process, though.
For a big project like this where I want things to look really nice, I always opt for a power sander. Since clear vertical grain Doug fir is already pretty smooth, I started with a 150-grit and then finished out with a 220-grit. If you’re working with spruce, it might be best to start with 100-grit sandpaper.


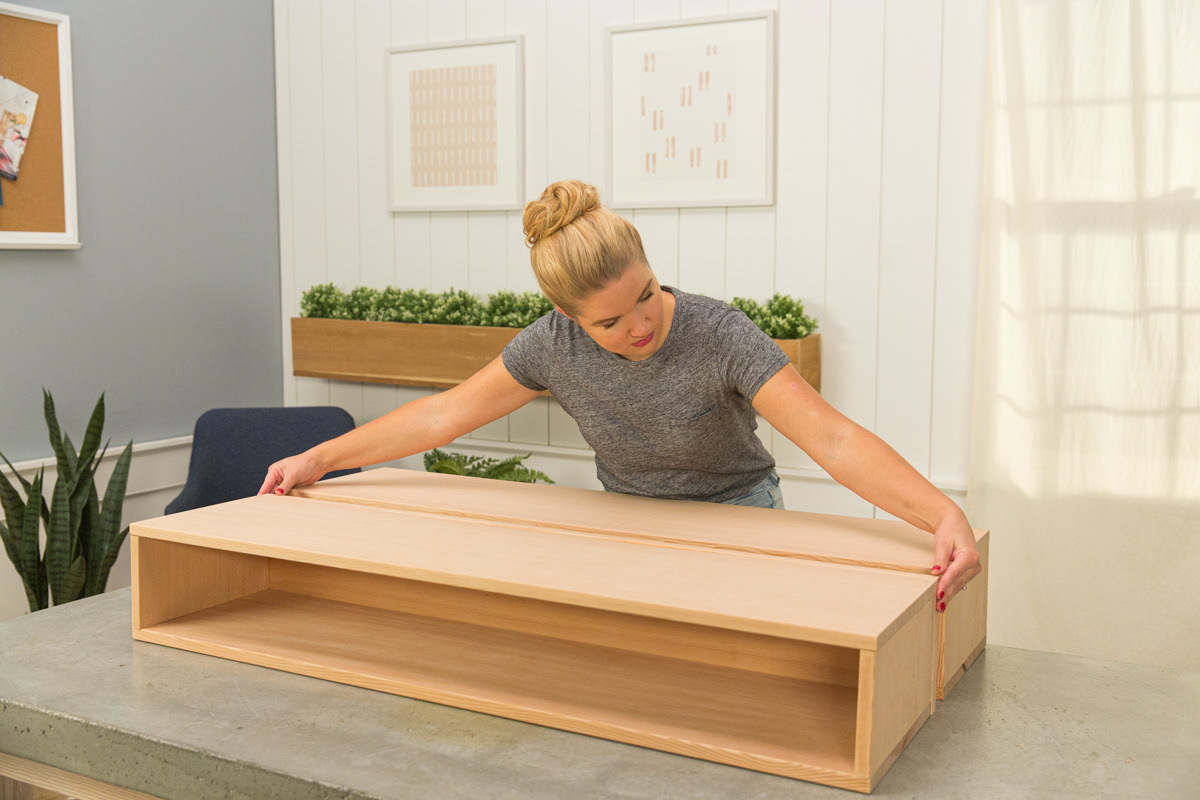
Step 4: Assemble both one-by-twelve boxes
To assemble the boxes that make up the two halves of this table, I decided to use nails and glue instead of screws. I did this because the nails are smaller and easier to cover on the surface of the table. I hammered the nails in by hand, but you could use a nail gun to make this process faster.
First, assemble the box with the pocket holes. Position the bottom shelf (with the pocket holes facing up) on top of the two short end pieces. Make sure that the pocket holes on the end pieces are on the inside of the box and that they’re close to the table rather than the long piece. Use a speed square to line up the pieces neatly, and pre-drill through the “top” of the long piece with a 1/16” drill bit (it can be tough to perfectly line everything up when using a hammer and nails, so I pre-drilled beforehand to ensure precision). I pre-drilled three holes all ⅜” from the end of the one-by-twelve—the two on the outside both ¾” from the edge, and the one in between perfectly centered at 5 ⅝”. Once the holes are pre-drilled, separate the two pieces and add the glue (I always like to add glue after pre-drilling because it slides around so much, and it’s easier to be accurate in your drilling when there isn’t glue). Hammer in nails until almost flush with the wood, and then use a nail set to hammer until just beneath the wood's surface. This will allow us to cover the nails neatly with wood filler.
When both ends are secured to the long piece, flip the whole thing over and position the tabletop piece on top of the end pieces, just like with the bottom piece. Line up and secure using the same method.
Repeat this whole step with the pieces that weren’t pre-drilled with the Kreg Jig to create the other box that makes up the table.
Now, I noticed in this assembly process that because nails don’t have the same power to pull two pieces together as screws do, they wouldn't be able to keep the boards from cupping. If you encounter cupping, or are having trouble getting the boards to lie flat, here are two solutions: 1) If the cupping is happening with the bottom shelf piece, you can add in a screw on the bottom (where it won't be visible) to pull the pieces together; 2) If the top piece isn't lying flat, use clamps to hold the pieces together until the glue dries.


Step 5: Connect the two halves
Position the one-by-eight piece on the backside of the non-pocket hole side, lining up the ends and the top. Secure with glue and nails as you did before. If the pieces aren’t lying close together, you can use the same techniques from the previous step of adding screws or clamping the pieces until the glue dries. Whether you’re using screws or nails, it’s important to make sure you’re not placing them in the same spots where the Kreg Jig screws will go. I avoided this by keeping the other box with the pocket holes in front of me as a reference point.
Once this first side has dried, flip it upside down and line it up with the pocket hole side (with all the pocket holes facing up). Again, line up the ends and the top and then secure with 1 ¼” Kreg Jig screws.


Step 6: Fill in holes with wood filler
Adding wood filler to the nail holes is just another way to elevate this project and take it to the next level. I picked a wood filler that best matched the wood I was using (which happened to be DAP’s plastic wood in light oak). Whenever using a wood filler, make sure that you read the directions on the side of the can and apply it at the right time. Some fillers are stainable, and some are supposed to be added after the staining process.
Overfill the holes so that they can be sanded down in the next step. This is so much easier than trying to get a perfectly smooth pass with the putty knife. Allow the wood filler to dry before moving on to the next step.

Step 7: Sand again
Now that everything is assembled, this is a great time to go in for a final sanding. I like to use this time to touch up any imperfections from the assembly process. If any seams aren’t lining up nicely, you can lower the grit and do some more serious sanding. Otherwise, this should just be a once-over with 220-grit sandpaper. Make sure to sand down the wood filler during this step as well.


Step 8: Condition wood
I often skip this step in projects, but I decided to use a wood conditioner because I was aiming for something near perfection. This is an extra step (that’s always shorter than I expect it to be) to prep the wood to receive the stain in a uniform way. First, remove any dust from sanding. You can do this with a rag dampened with water or mineral spirits or with a tack cloth.
Apply the wood conditioner according to the directions on the side of the can, allowing it to penetrate the wood for as long as recommended, wiping off (if instructed), and applying stain within the window of time given.


Step 9: Apply stain
Apply stain to the conditioned wood following the directions on the side of the can. This was my first time using Minwax’s simply white color, and it definitely acted a bit differently than other stains I’ve worked with—it’s almost like a cross between stain and paint. This meant that when I went to wipe it off, it was a lot streakier than usual. Don’t worry if this happens to you! I was able to fix this problem by just continuing to wipe down the stain until it looked consistent across the table. Allow the stain to fully dry before applying a clear finish.
For more tips on getting set up to stain, check out How To Stain Wood.


Step 10: Add hairpin legs
Once the stain has dried, it’s time to add the legs! Using a speed square to measure where the legs should go, I drew lines 1” in from the edge of the table. The legs came with longer screws, but I swapped them out for ¾” screws (so that they wouldn’t break through the top of the table).
I ended up with one corner that was causing the table to wobble (achieving a perfectly level surface when working with wood is nearly impossible in my experience), but this was easily fixed by adding some plastic shims between the leg and the bottom of the table.


Step 11: Finish
The last step is to add a clear finish to your table. This is a very important step if you want this piece to last. Because of the light-colored stain we used, I recommend using a water-based polyurethane clear finish (I used a water-based coat with a satin finish). This means that you’ll need to give the oil-based stain extra time to dry, so you don’t run into any problems. Follow the directions on the can, making sure to pay attention to the minimum amount of coats. You absolutely don’t want to apply any less than the minimum. For my finish, the minimum was three coats. I did five coats on the tabletop and four coats on the rest of the table.

For more inspiration on updating at-home furniture staples, check out our DIY midcentury modern dining room table, DIY end table, and our IKEA dresser hack.


